


Level: Intermediate

Time : 4 hrs
Cook Time : 2 hrs 30 mins
Prep Time: 1 hr 30 mins

Yield: Serves 8-10
Since ilFornino pizza ovens are not just for pizza, what better way to utilize the wonderful baking characteristics of wood fired cooking than at Thanksgiving. The opportunity is magnified by the fact that many family and friends typically attend your festive celebration.
Introduction
In this article, I will emphasize the cooking of your turkey, but include preparation of sides, all well. The heat of the oven will therefore be thoroughly utilized. Turkey, stuffing and a variety of sides, are the cornerstone of a great Thanksgiving celebration. Once you have assessed any dietary restrictions of you and your guests, you can address the kind of sides that make sense. Timing is extremely critical, as your oven burns hot at first, and cools throughout the day. Depending on the available thermal mass of your unit, you may have to add wood during some of the cooking phase to maintain a steady temperature range. At hotter temperatures, items such as butternut squash, sweet and regular potatoes, and vegetables that are slated for grilling would work well. It is important to make sure you have all your ingredients prepared before proceeding. Many people go all out to make sure the turkey is going to come out tender, tasty and juicy but place the bird into a brine a day ahead of time. I usually did not have the luxury via lack of space in my refrigerator of my cooler to do this, however, an alternative is to purchase a Kosher turkey, as it has been pre-salted before it arrives at the market. (that goes for chicken and meat as well.)
In this article, I will emphasize the cooking of your turkey, but include preparation of sides, all well. The heat of the oven will therefore be thoroughly utilized. Turkey, stuffing and a variety of sides, are the cornerstone of a great Thanksgiving celebration. Once you have assessed any dietary restrictions of you and your guests, you can address the kind of sides that make sense. Timing is extremely critical, as your oven burns hot at first, and cools throughout the day. Depending on the available thermal mass of your unit, you may have to add wood during some of the cooking phase to maintain a steady temperature range. At hotter temperatures, items such as butternut squash, sweet and regular potatoes, and vegetables that are slated for grilling would work well. It is important to make sure you have all your ingredients prepared before proceeding. Many people go all out to make sure the turkey is going to come out tender, tasty and juicy but place the bird into a brine a day ahead of time. I usually did not have the luxury via lack of space in my refrigerator of my cooler to do this, however, an alternative is to purchase a Kosher turkey, as it has been pre-salted before it arrives at the market. (that goes for chicken and meat as well.)
Special Consideration
Based on the size of your oven, you must be cognizant of the opening size, and available internal real estate to accommodate your bird. While cooking a whole bird is the most common presentation, spatchcock, or splitting your bird in half offers an alternative method of preparation which allows for quicker cooking times, as well.
Equipment Necessary
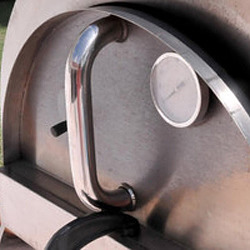
- ilFornino wood-fired oven or other similar oven with wood and associated tools for fire management.
- Measuring cups, spoons, and a bowl to hold and mix all the ingredients.
- A large roasting pan with a “V” rack to accommodate the turkey. Have plenty of heavy-duty aluminum foil, a turkey baster, or a large spoon.
- Chef’s knife, butcher block, and a carving knife and fork for slicing and serving.
- Foil trays big enough to accommodate stuffing and various sides.
- Use a digital or accurate analog thermometer to detect the internal temperature of your turkey.
- Use a long enough length of butcher’s twine to secure the turkey.
- Insulated silicone gloves and/or turkey lifter forks for rotating and removing the turkey.
Ingredients for Turkey and Stuffing:
- A 12 to 14 lb. kosher fresh turkey, with giblets removed. (If frozen, follow the defrosting procedure as stated on the packaging.) Use the giblets with some celery, carrot, and dill to create a stock ahead of time. This will be used to infuse the stuffing and be the basis for tasty gravy, as well as liquid for the bottom of the roasting pan during the cooking process.
- Extra virgin olive oil with optional melted butter for initial basting of the bird.
- Salt and pepper.
- Turkey or chicken stock will be used for the bottom of the pan when roasting, as well as to moisten the stuffing below. To make your own stock, boil the neck and giblets with water, salt, chopped onion, garlic, celery, and carrots for about 1 hour. Drain, and you are ready to go.
- Onion, lemon, rosemary, thyme, and garlic for stuffing the turkey as it cooks. Prepare the ingredients below for the bread stuffing in a separate pan.
- Parsley (finely chopped), diced celery, diced onion, sliced sage, dried bread cubes, chopped garlic, cooked chestnuts, your favorite sausage (without casing), chopped mushrooms, eggs, turkey or chicken stock, diced apple, chopped walnuts or pecans, salt and pepper to taste. There are a host of combinations that you may choose to use or eliminate depending on your preference. Unless everyone is on board, I wouldn’t make the stuffing spicy. The amount of each ingredient has been omitted, as it would depend on your taste and the number of guests.
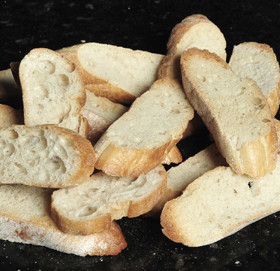
- For a unique pizza lover’s stuffing, make some focaccia bread with your favorite pizza dough recipe. Cut up the bread into cubes, spread it on a baking sheet, and place it in the oven to crisp up.
Steps For Preparation
- Brine or salt your defrosted or fresh turkey a day ahead of time. Allow the moisture to evaporate in the fridge overnight. This will facilitate browning of the skin.
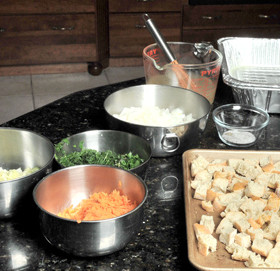
- Gather all your ingredients.

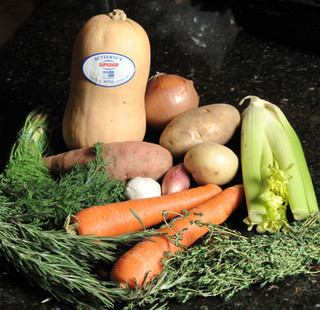
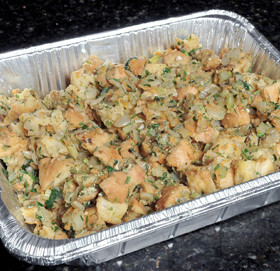
- Prepare the stuffing by slicing, cubing and toasting good bread. Also, prepare ingredients: Chopped dill, onion, celery, grated carrots, rosemary, sage, thyme, chicken or turkey broth, salt and pepper, and whole eggs. Fry up the onion, celery and carrots until golden. Remove from stove and add the spices, herbs. Whisk the eggs into the broth, and add to the other ingredients. Once mixed up properly, add the toasted bread cubes and let the liquid soak into the bread. Spray a double-foiled pan with cooking oil, and spread out the stuffing mix. This will be baked covered with foil for about 30 to 60 minutes covered, and 10 to 15 minutes uncovered to crisp the top.
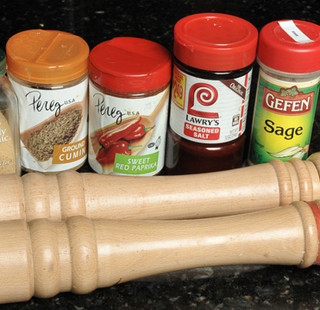
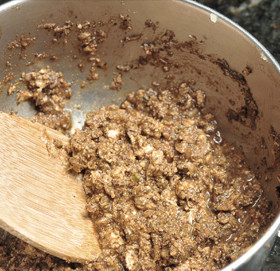
- Spice paste rub for inside the cavity, between the skin and the turkey, as well as outside. I used a Peruvian recipe: Salt, pepper, lime juice and zest, cumin, paprika, olive oil, dry oregano and garlic paste. After combining all the ingredients, carefully separate the skin of the turkey, both front and rear cavity. With gloved hands, insert and spread paste between the skin, in each cavity, and on the entire surface of the bird. Once applied, insert some chopped vegetables into the cavity, such as, onion, celery, carrot, dill, and rosemary. Place the turkey, breast side up on the rack within the roasting pan. Tightly cover the end of the legs, and wings with foil. Using kitchen twine (cotton, not synthetic) tie legs closed and a loop around the wings. Dust the turkey with some paprika. Add stock, vegetables, and herbs to the bottom of the pan. This will be a basis for gravy. During the cooking cycle, you will need to add water or more broth, as it will evaporate. This is important for preventing burning
Stuffed cavity:

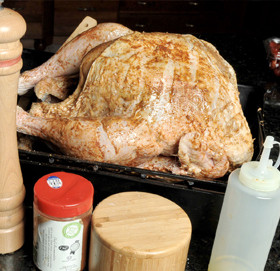
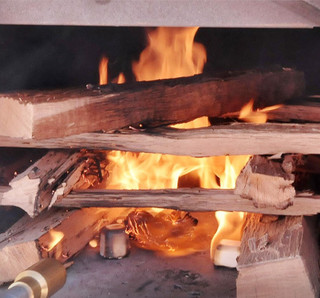
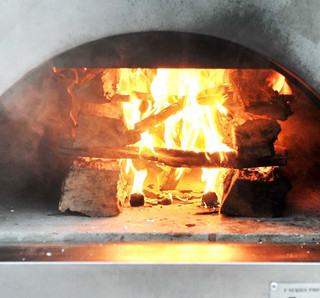
- Cover the turkey breast with heavy-duty foil and place into a 500-degree wood-fired oven legs first. You want either very small or no flame. I recommend an ilFornino wood-fired oven with one flat cooking surface to accommodate easy positioning and turning of the heavy roasting pan. You should light your oven about 1 hour before inserting to get a good heat soak and temperature reduction. Based on your available real estate, you can split the wood and coals on the sides to accommodate even cooking, however, I didn’t find that to be mandatory. Set a timer for 30 minutes, check progress and rotate 180 degrees. If you find that the temperature drops below 325 degrees, remove the turkey and add some wood. Use a blowpipe to resurrect the flames to ignite the newly placed wood. Keeping the flame at one side makes it easy to control the addition of more fuel. Do not insert the turkey until the flame burns clean.
After about an hour to and hour and a half, remove the turkey and flip it over, breast side down and repeat the 30-minute interval rotation. Check the temperature of the thigh until it reaches about 160 degrees Fahrenheit. Remove the foil, turn the bird breast side up and allow the skin to crisp up. Make sure the skin doesn’t burn. Once the skin is crisp, make sure the thigh temperature is at 170 degrees. It will be ready to remove and rest for at least 20 minutes before carving.
Thanksgiving Side Dishes
Sides should be done at the same time, as they will be finished first and allow time for final preparation. Try a variety of potatoes, peppers, squash, roasted garlic, onions and even eggplant for a Middle Eastern flair.
Sheshido Peppers and salt
Eggplant processed

Roasted Peppers with salt, sliced garlic and extra-virgin olive oil
Oh, and don’t forget fresh Cranberry Sauce. I added pineapple to give it another level of flavor. Do this ahead of time to allow cooling, if you prefer.

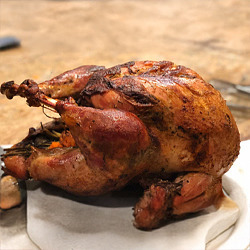
VOILA: The finished TURKEY is ready for carving:

Tips
- Use the leftover turkey carcass to create a soup or stock by boiling for about an hour with soup vegetables in a large pot or pressure cooker.
- The best tip I can offer is this: If you like to be invited to a delicious Thanksgiving dinner event, DO NOT DISCUSS POLITICS.
Summary
Utilizing a wood-fired oven to create a beautiful Thanksgiving meal, can levitate the flavor and experience of the food. However you prepare, or cater your meal, we wish you a happy and healthy Thanksgiving Holiday.